注釈
Go to the end to download the full example code.
スライシング#
ボリュームから薄い平面スライスを抽出します.
from __future__ import annotations

import matplotlib.pyplot as plt
import numpy as np

import pyvista as pv
from pyvista import examples
PyVistaメッシュには,すべてのデータセットに直接バインドされた複数のスライシングフィルタがあります.これらのフィルタを使用すると,ボリュームデータセットをスライスして,データのボリュームからセクションを抽出して表示できます.
One of the most common slicing filters used in PyVista is the
pyvista.DataObjectFilters.slice_orthogonal() filter which creates three
orthogonal slices through the dataset parallel to the three Cartesian planes.
For example, let's slice through the sample geostatistical training image
volume. First, load up the volume and preview it:
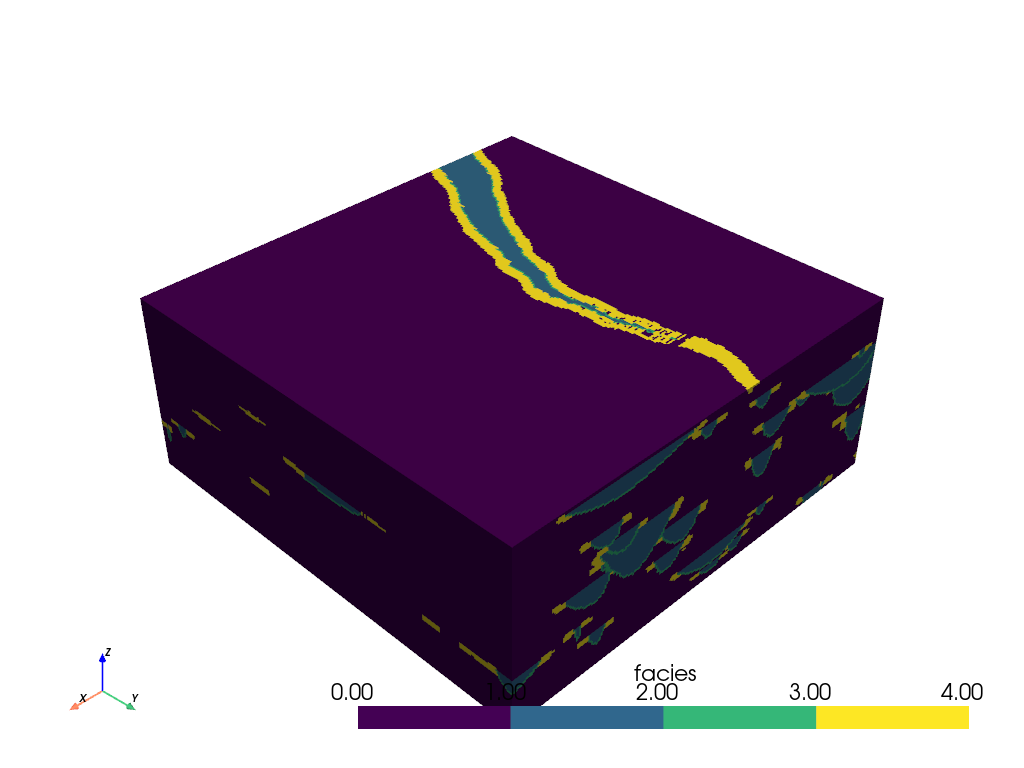
このデータセットは3 Dボリュームであり,このボリューム内に検査したい領域がある場合があります.メッシュを使用してスライスを作成し,ボリュームの内部についてさらに詳しく調べることができます.
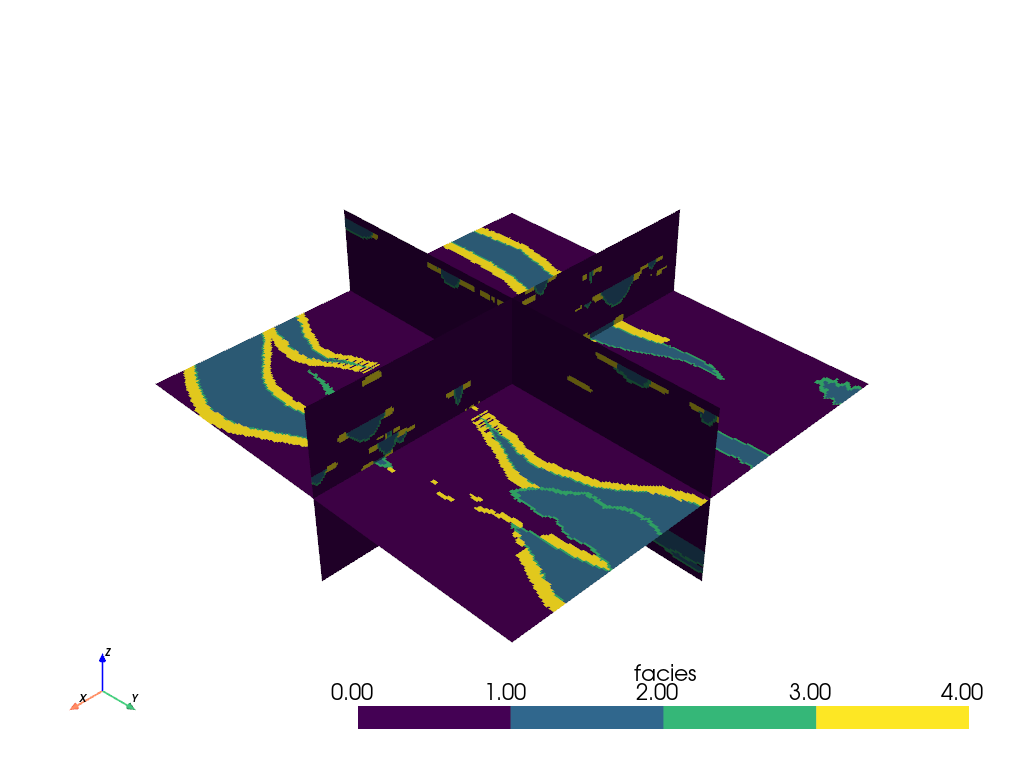
直交スライスは,ボリューム全体で簡単に変換できます:
slices = mesh.slice_orthogonal(x=20, y=20, z=30)
slices.plot(cmap=cmap)
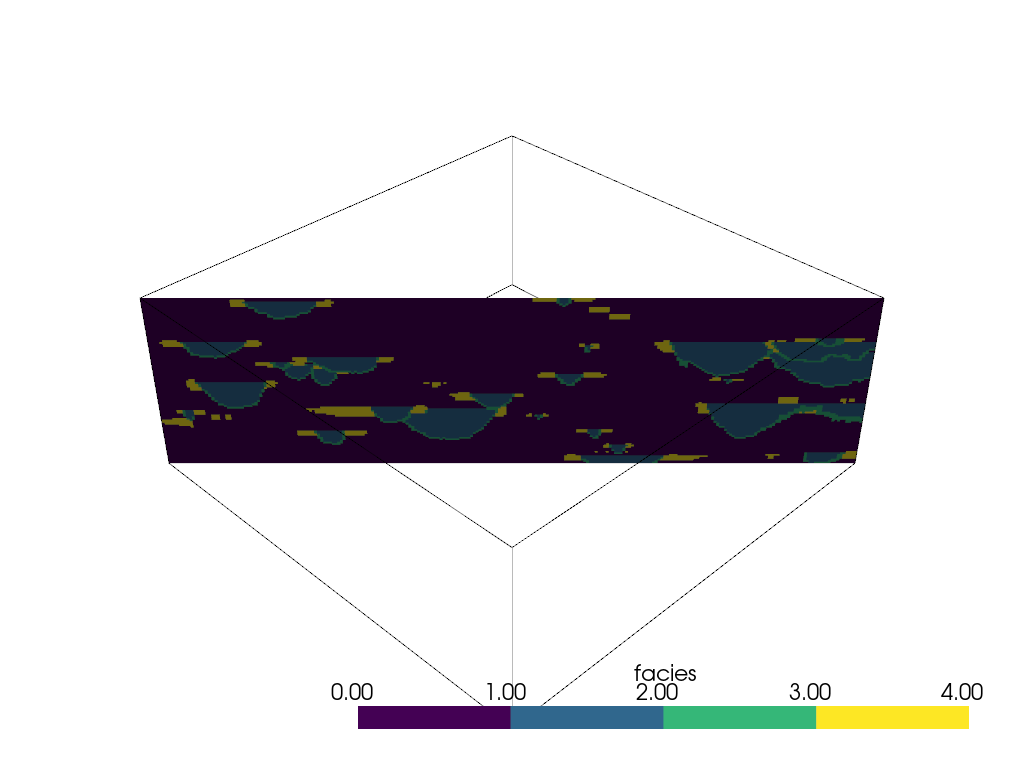
We can also add just a single slice of the volume by specifying the origin
and normal of the slicing plane with the pyvista.DataObjectFilters.slice()
filter:
# Single slice - origin defaults to the center of the mesh
single_slice = mesh.slice(normal=[1, 1, 0])

p = pv.Plotter()
p.add_mesh(mesh.outline(), color='k')
p.add_mesh(single_slice, cmap=cmap)
p.show()
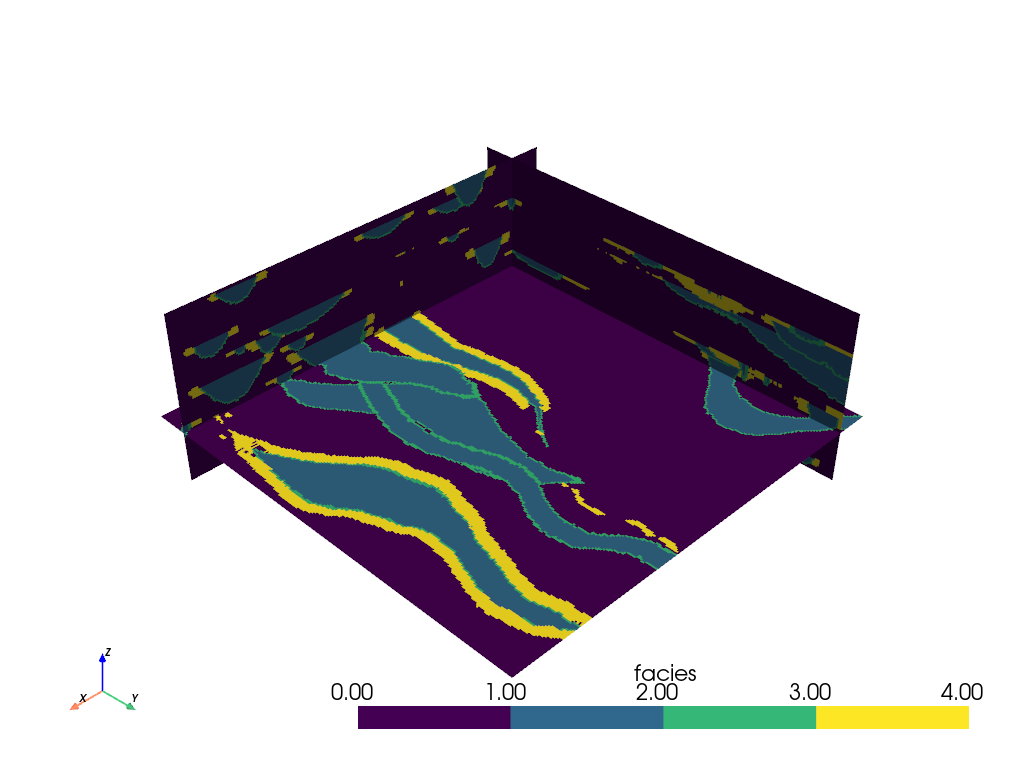
Adding slicing planes uniformly across an axial direction can also be
automated with the pyvista.DataObjectFilters.slice_along_axis() filter:
slices = mesh.slice_along_axis(n=7, axis='y')

slices.plot(cmap=cmap)

線分に沿ってスライス#
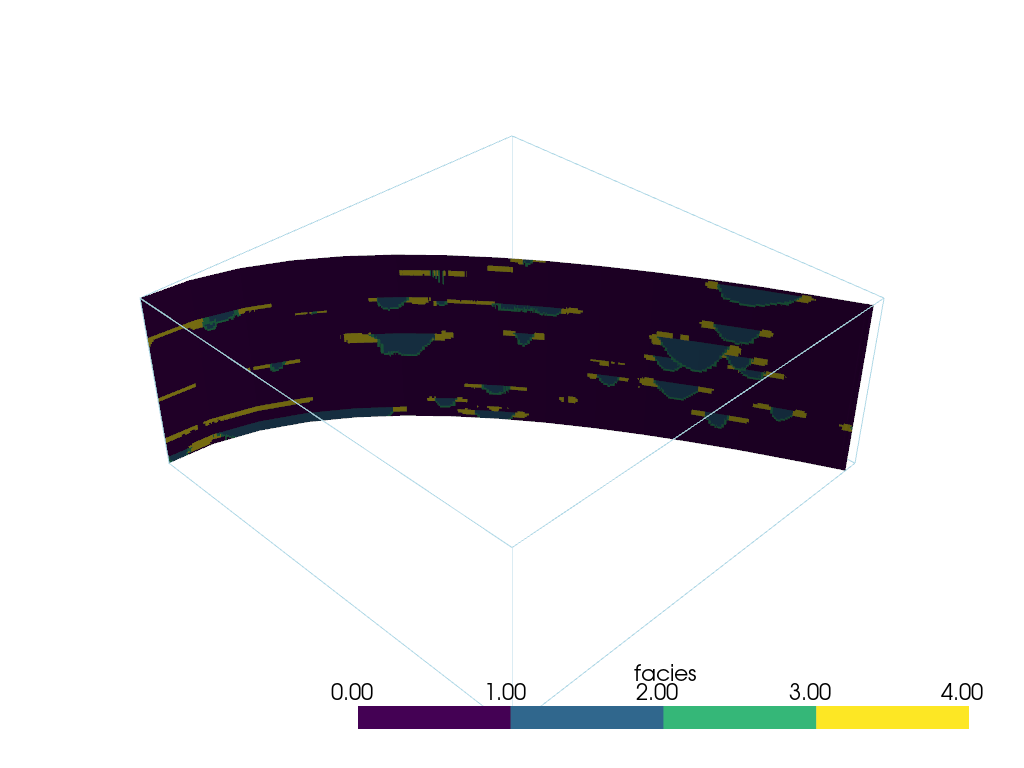
We can also slice a dataset along a pyvista.Spline() or
pyvista.Line() using the pyvista.DataObjectFilters.slice_along_line() filter.
最初に,対象のデータセットを使用して線のソースを定義します.このタイプのスライスは計算コストが高く,線に多くの点がある場合は時間がかかることに注意してください.線の解像度を低くしてください.
model = examples.load_channels()


def path(y):
    """Equation: x = a(y-h)^2 + k"""
    a = 110.0 / 160.0**2
    x = a * y**2 + 0.0
    return x, y


x, y = path(np.arange(model.bounds.y_min, model.bounds.y_max, 15.0))
zo = np.linspace(9.0, 11.0, num=len(y))
points = np.c_[x, y, zo]
spline = pv.Spline(points, 15)
spline
次に,フィルタを実行します.
p = pv.Plotter()
p.add_mesh(slc, cmap=cmap)
p.add_mesh(model.outline())
p.show(cpos=[1, -1, 1])
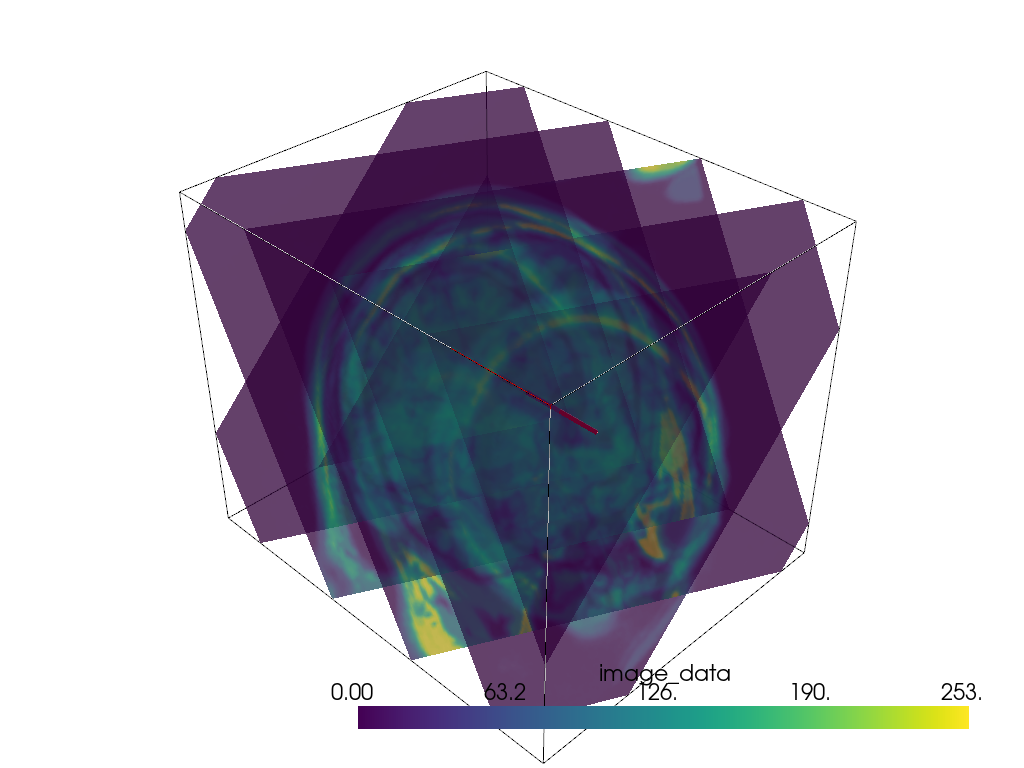
ベクトル方向の複数のスライス#
ベクトル方向に沿って垂直にメッシュをスライスします.
mesh = examples.download_brain()

# Create vector
vec = np.array([1.0, 2.0, 1.0])
# Normalize the vector
normal = vec / np.linalg.norm(vec)

# Make points along that vector for the extent of your slices
a = mesh.center + normal * mesh.length / 3.0
b = mesh.center - normal * mesh.length / 3.0

# Define the line/points for the slices
n_slices = 5
line = pv.Line(a, b, n_slices)

# Generate all of the slices
slices = pv.MultiBlock()
for point in line.points:
    slices.append(mesh.slice(normal=normal, origin=point))
p = pv.Plotter()
p.add_mesh(mesh.outline(), color='k')
p.add_mesh(slices, opacity=0.75)
p.add_mesh(line, color='red', line_width=5)
p.show()
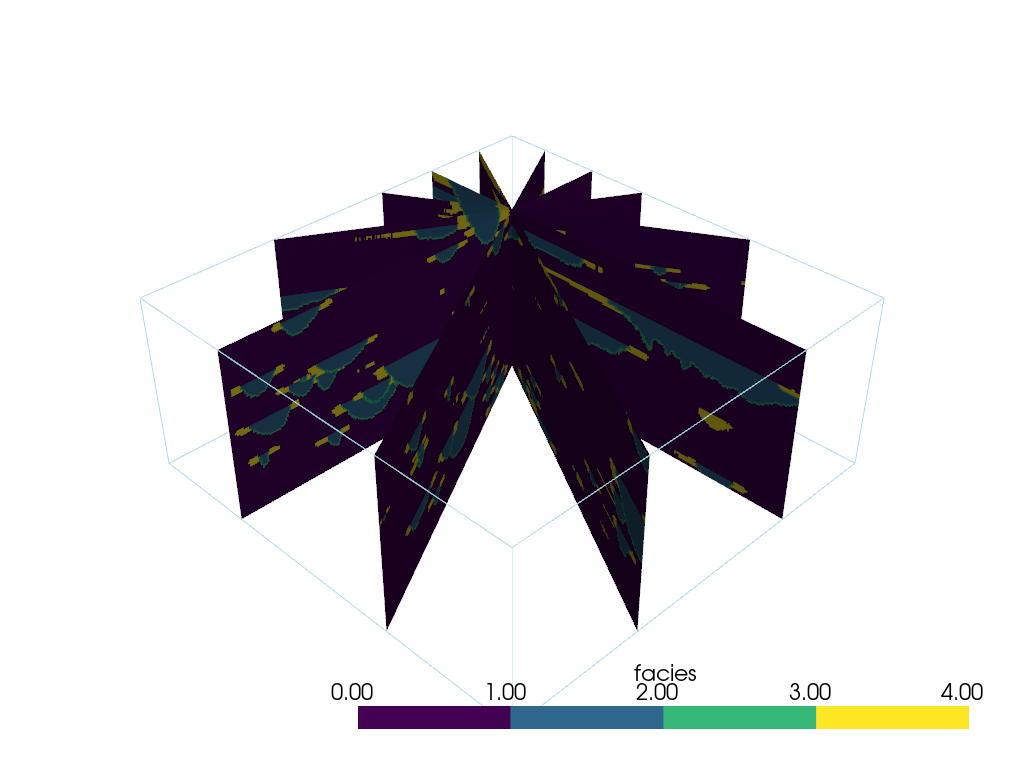
異なる軸受でスライス#
ユーザーが選択した位置を中心にして,さまざまな方位のスライスを多数作成する方法の例.
スライスを方向付けるポイントの作成
ranges = np.ptp(np.array(model.bounds).reshape(-1, 2), axis=1)
point = np.array(model.center) - ranges * 0.25
ここで,Z軸を中心にスライスを回転させる法線ベクトルをいくつか生成します.円はZ軸を中心としているため,円の計算式を使用します.
increment = np.pi / 6.0
# use a container to hold all the slices
slices = pv.MultiBlock()  # treat like a dictionary/list
for theta in np.arange(0, np.pi, increment):
    normal = np.array([np.cos(theta), np.sin(theta), 0.0]).dot(np.pi / 2.0)
    name = f'Bearing: {np.rad2deg(theta):.2f}'
    slices[name] = model.slice(origin=point, normal=normal)
slices
これを表示します.
p = pv.Plotter()
p.add_mesh(slices, cmap=cmap)
p.add_mesh(model.outline())
p.show()
Total running time of the script: (0 minutes 24.125 seconds)