注釈
Go to the end to download the full example code.
平面とボックスでクリップします#
平面またはボックスを使用してデータセットをクリップ/カットします.
from __future__ import annotations

import pyvista as pv
from pyvista import examples
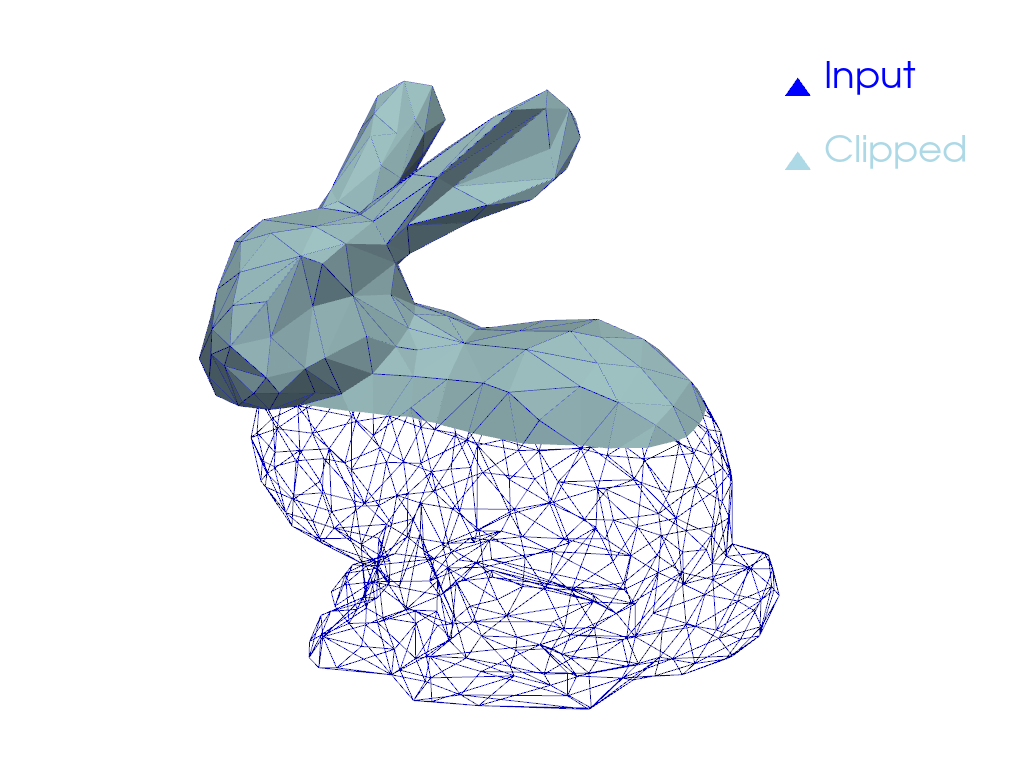
平面付きクリップ#
Clip any dataset by a user defined plane using the
pyvista.DataObjectFilters.clip() filter
dataset = examples.download_bunny_coarse()
clipped = dataset.clip('y', invert=False)

p = pv.Plotter()
p.add_mesh(dataset, style='wireframe', color='blue', label='Input')
p.add_mesh(clipped, label='Clipped')
p.add_legend()
p.camera_position = [(0.24, 0.32, 0.7), (0.02, 0.03, -0.02), (-0.12, 0.93, -0.34)]
p.show()
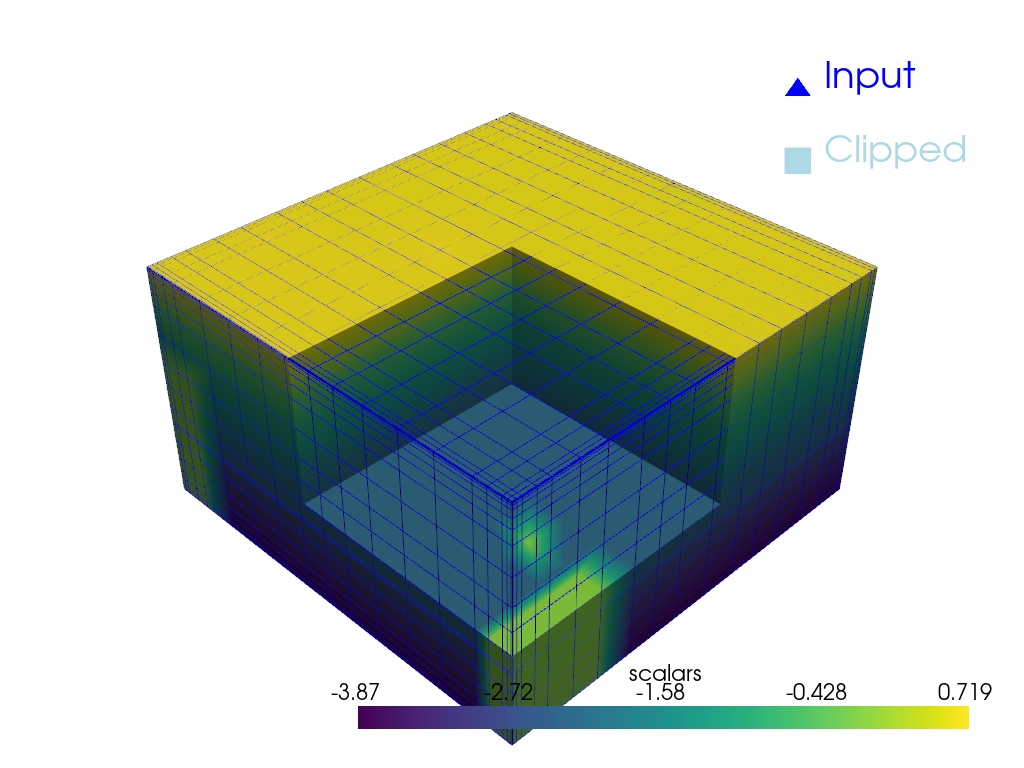
境界付きクリップ#
Clip any dataset by a set of XYZ bounds using the
pyvista.DataObjectFilters.clip_box() filter.
dataset = examples.download_office()

bounds = [2, 4.5, 2, 4.5, 1, 3]
clipped = dataset.clip_box(bounds)

p = pv.Plotter()
p.add_mesh(dataset, style='wireframe', color='blue', label='Input')
p.add_mesh(clipped, label='Clipped')
p.add_legend()
p.show()
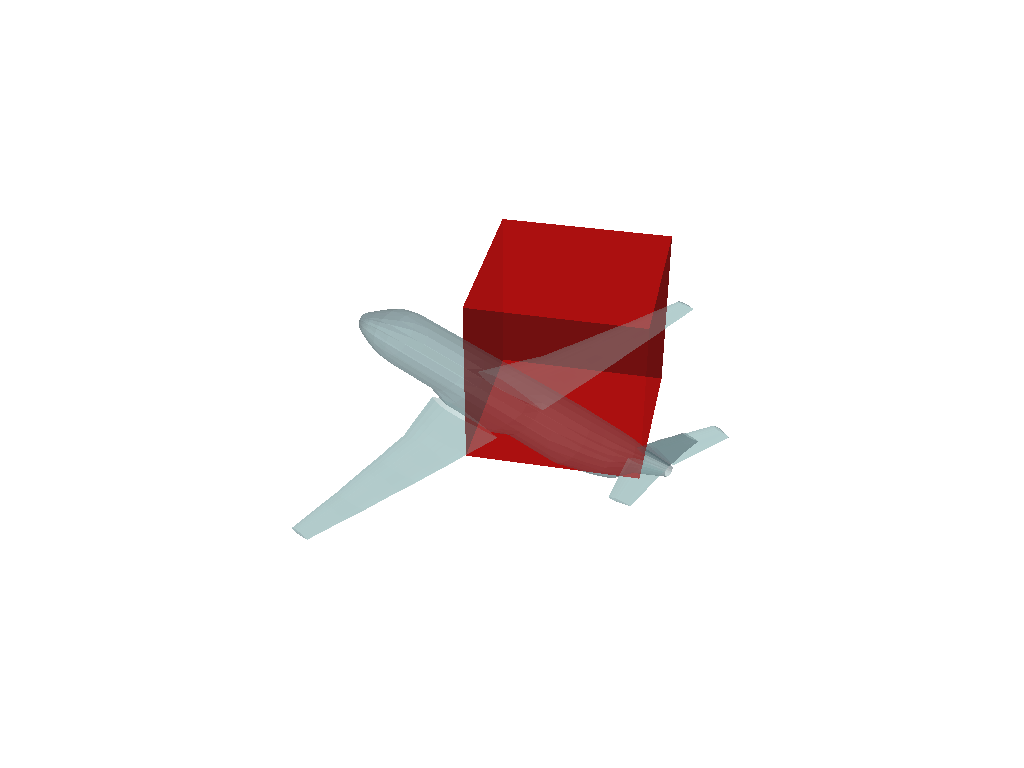
回転ボックス付きクリップ#
Clip any dataset by an arbitrarily rotated solid box using the
pyvista.DataObjectFilters.clip_box() filter.
mesh = examples.load_airplane()

# Use `pv.Box()` or `pv.Cube()` to create a region of interest
roi = pv.Cube(center=(0.9e3, 0.2e3, mesh.center[2]), x_length=500, y_length=500, z_length=500)
roi.rotate_z(33, inplace=True)

p = pv.Plotter()
p.add_mesh(roi, opacity=0.75, color='red')
p.add_mesh(mesh, opacity=0.5)
p.show()
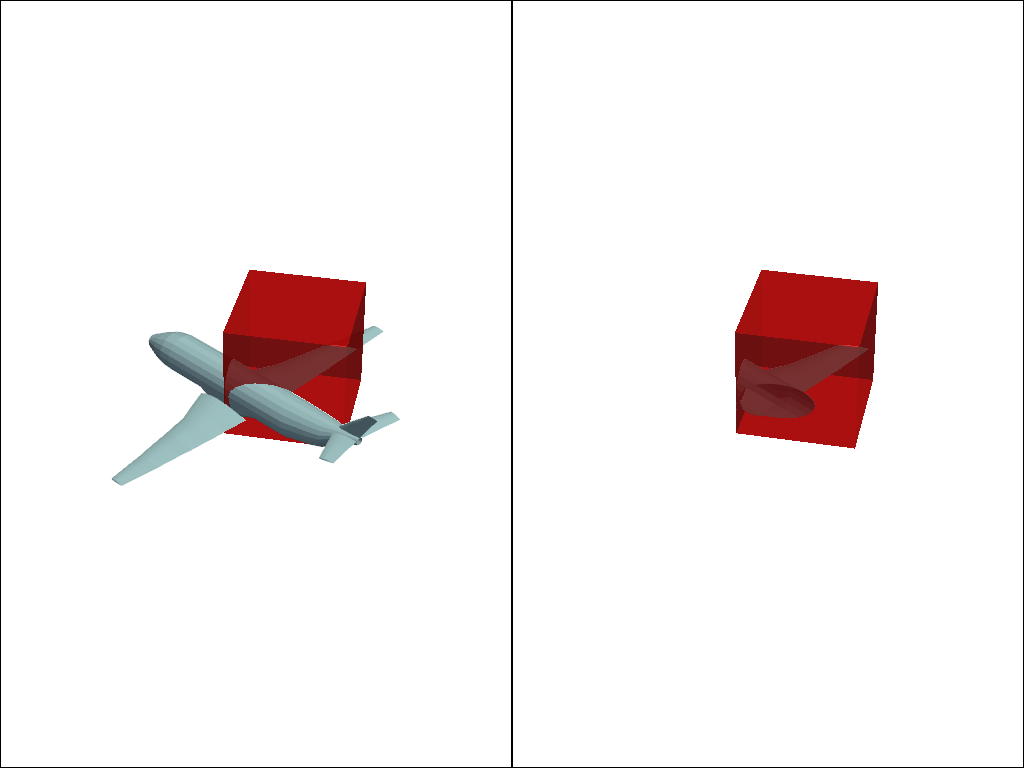
ボックスクリッピングアルゴリズムを実行します
extracted = mesh.clip_box(roi, invert=False)

p = pv.Plotter(shape=(1, 2))
p.add_mesh(roi, opacity=0.75, color='red')
p.add_mesh(mesh)
p.subplot(0, 1)
p.add_mesh(extracted)
p.add_mesh(roi, opacity=0.75, color='red')
p.link_views()
p.view_isometric()
p.show()
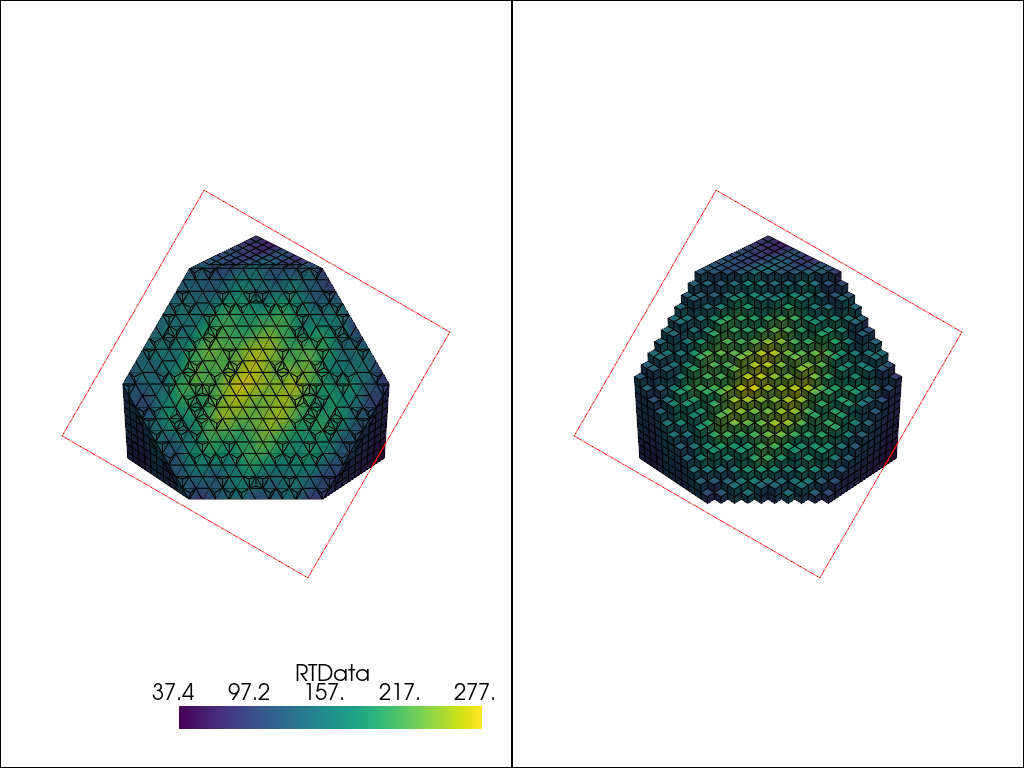
しわくちゃなクリッピング#
クリンプクリッピングは,クリップフィルタが境界上のセルを本当にクリップするのではなく,入力セルの構造を保持し,セル全体を境界から通過させたい場合に有効です.
This option is available for pyvista.DataObjectFilters.clip(),
pyvista.DataObjectFilters.clip_box(), and
pyvista.DataSetFilters.clip_surface(), but not available when clipping
by scalar in pyvista.DataSetFilters.clip_scalar().
# Input mesh
mesh = pv.Wavelet()
クリッピングプレーンの定義
標準クリップを実行します
クリンプクリップを行います
プロット比較
p = pv.Plotter(shape=(1, 2))
p.add_mesh(clipped, show_edges=True)
p.add_mesh(plane.extract_feature_edges(), color='r')
p.subplot(0, 1)
p.add_mesh(crinkled, show_edges=True)
p.add_mesh(plane.extract_feature_edges(), color='r')
p.link_views()
p.show()
Total running time of the script: (0 minutes 1.804 seconds)